The next step in the ‘How To’ series shows the stages that go in to making bespoke lampshades
Last month, I spent a cold February evening in the warmth and lovely surroundings at Homemade London, on a Lampshade Making Course my best friend bought me as a birthday present. It was great!
Lampshades are one of the big trends at the moment, and a really great way to inject colour and pattern in to your room. The high street has some good patterned ranges out there now that means patterned lampshades needn’t be chintzy.
They are tricky to do on your own – especially the rolling up section! And I’m not sure I’m confident enough to make the bespoke oversized versions we’ve used in lots of projects – like Catherine’s lounge – but I’ll definitely be making more of the smaller ones for the lamps in my new home.
Nichola and I are both going through a colour phase in our house and wanting to brighten everything up so we both ordered fabric from the beautiful Clarissa Hulse collection for Harlequin, and decided to go for the bigger 16″ shade to really show it off. Bear in mind silk is harder to work with than other fabrics, and patterns will need to be straight to just adds a little bit of complexity when making your first one!
Then cover your lampshade rings in double sided table suitable for electrical projects.

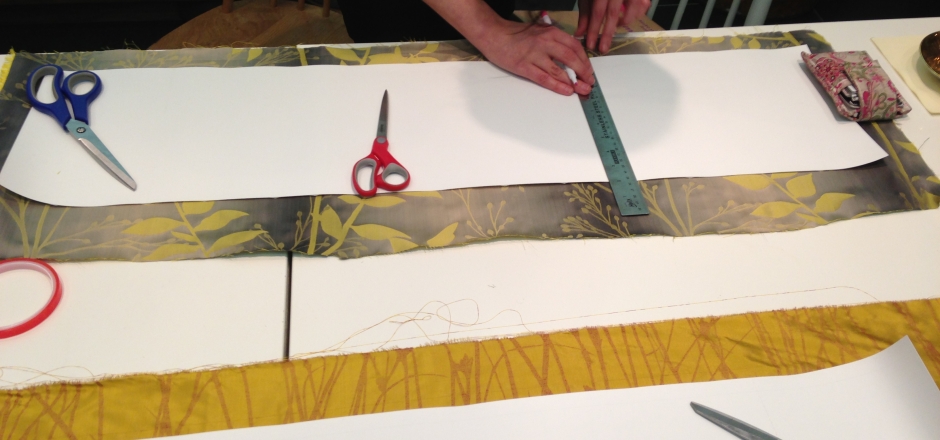
Lay the sticky vinyl out on the fabric and leave around a 1cm edge on 3 of the edges to allow a good finish for rolling and covering the end piece.

and cut out the shape of your lampshade, remembering the leave the 1cm edge! This version has a white inside but if you wanted to have a coloured inside there are other lampshade vinyls available or double sided so you can have a fabric lining too.
Use another strip of your double sided tape to wrap the fabric over on one end so that you get a nice outside edge on the lampshade when you wrap it round.

Take both of your lampshade rings, remove the plastic from the double sided tape so they are sticky, and start rolling the rings as close to the edge of the vinyl (without being on the fabric) as possible.
It took two of us to do this so no picture of this stage I’m afraid! 🙂
Take the double sided tape again and seal the end of your shade, then start to pull the 1cm fabric edge round to cover the inside of the lampshade ring.

A credit card works best for this (although the friction means my Liberty points card now has rounded edges!) and push all the excess fabric into the seam so it sticks to the tape on your lampshade ring and covers everything nicely. It takes a while but is very rewarding when all neat and tidy.

And that’s it! The finished lampshades from our group all look stunning:

And we’re really proud of our colourful creations

So thanks so much to Homemade London for a fantastic course – I’d fully recommend booking on – it’s so much more fun learning in a group and they can explain everything far better than I can, but if you fancy having a go on your own, lampshade making kits are available from Need Craft.
Telephone: 07968 699 441
Email: anna@furnishedbyanna.co.uk
Furnished by Anna is owned by Anna Ward, who set up the company to offer affordable interior design, without scrimping on the wow factor!


Comment & Share